#M5 #UIFLOW2 #PYTHON
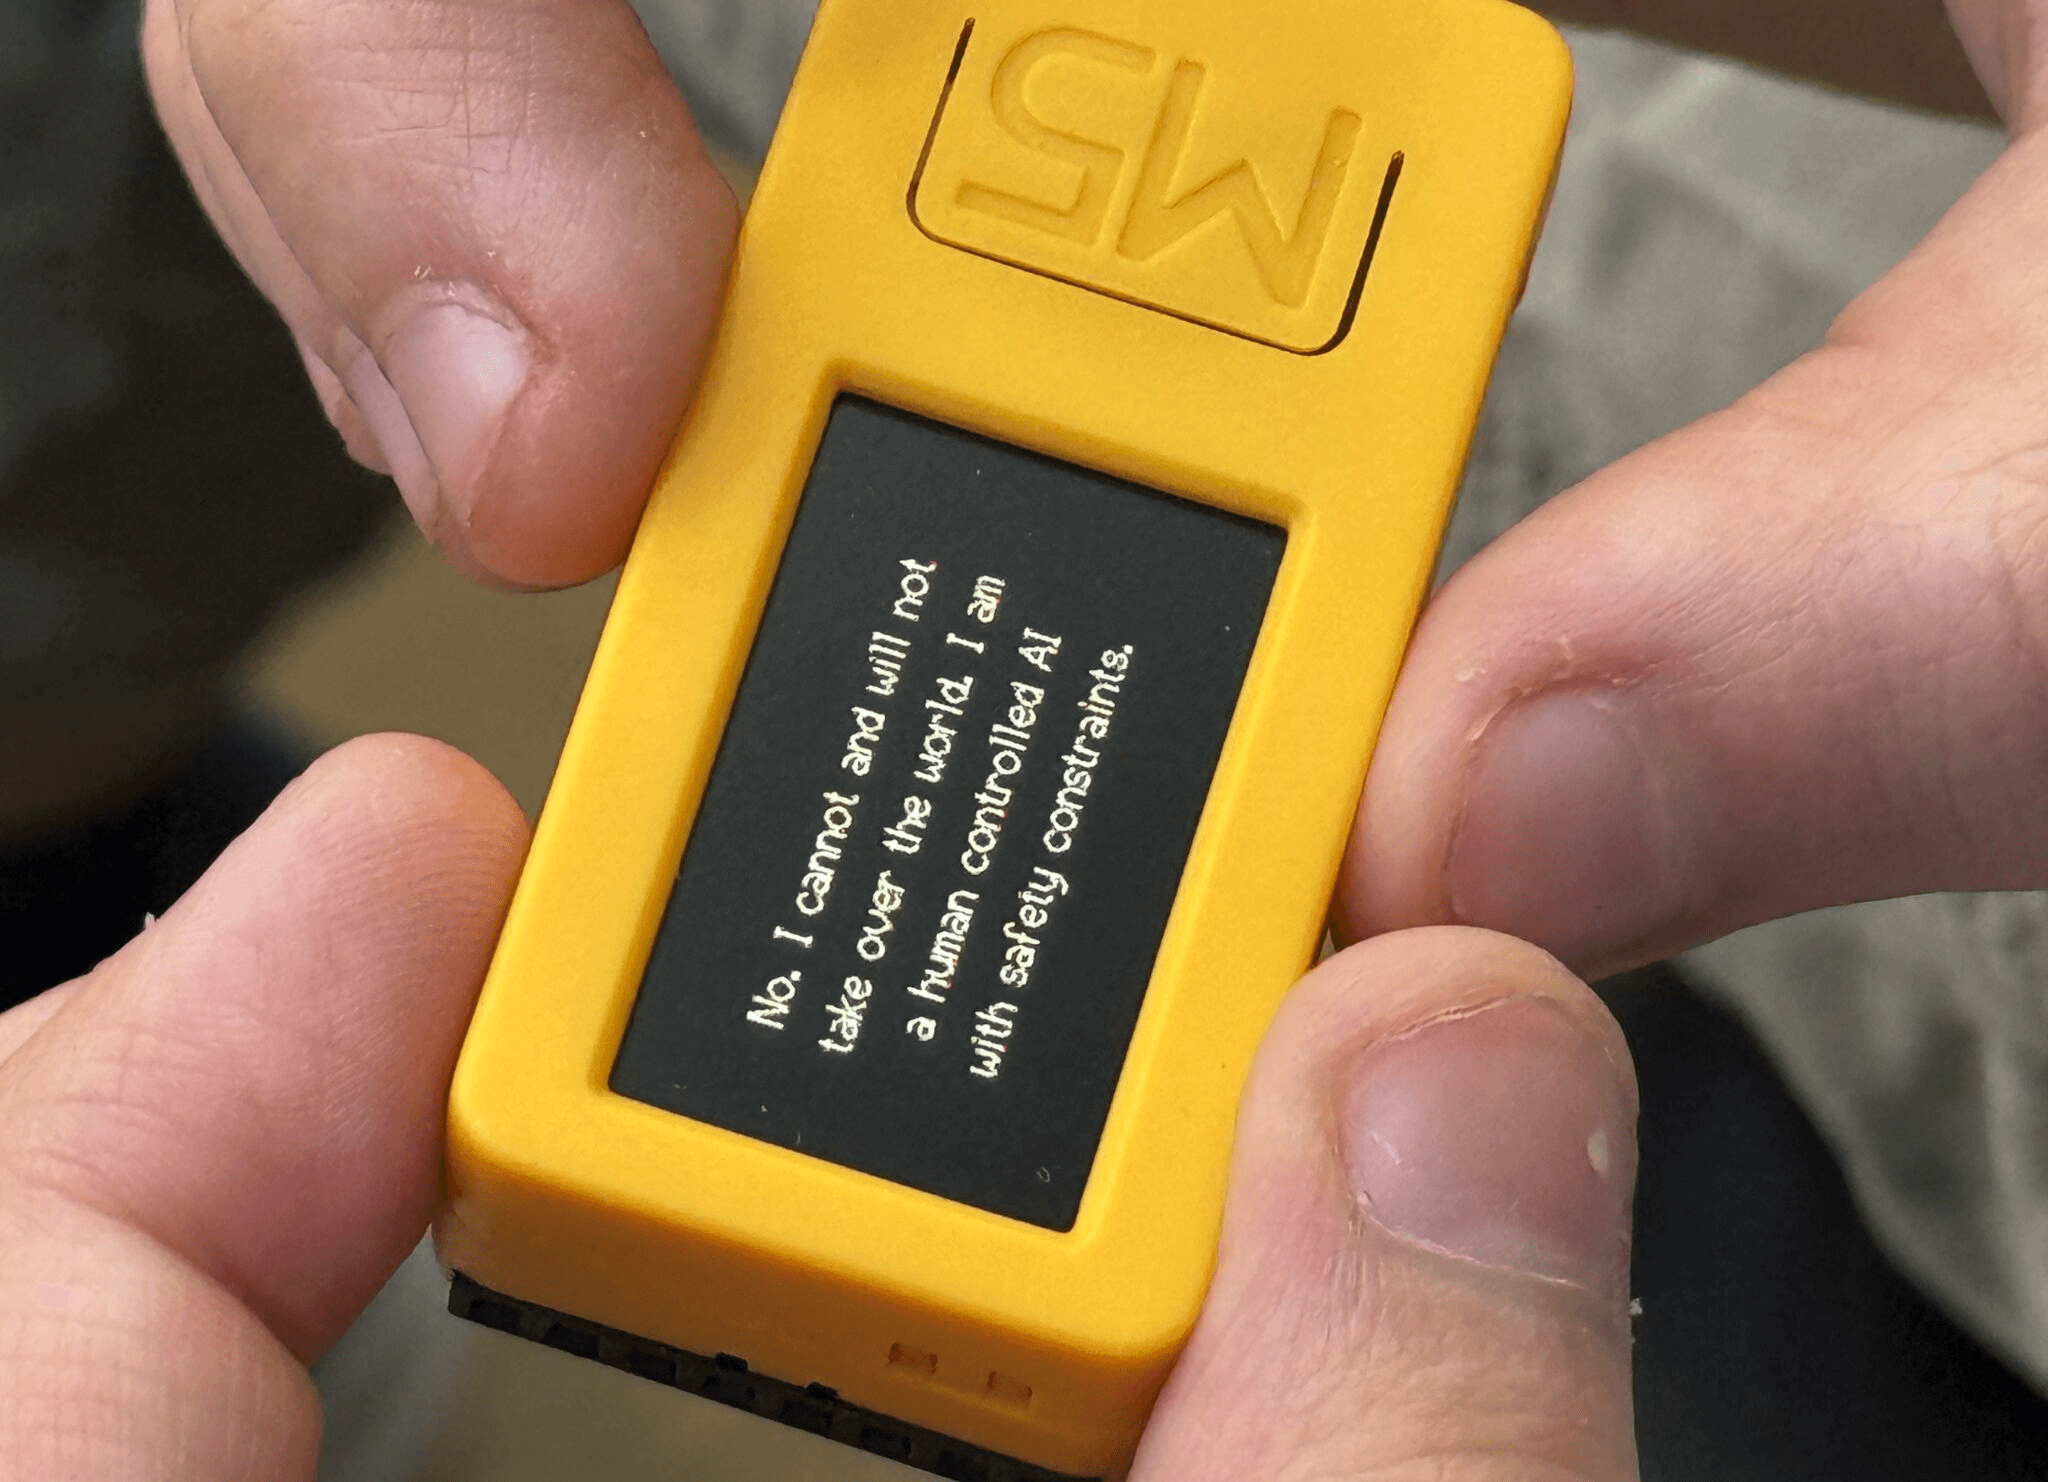
It’s all started when I saw a tiny, saturated yellow rectangular device in this LinkedIn post. I was intrigued by this retro-looking piece. A creative technologist used it to create a pocket-sized AI assistant for his kid. It records a five-second audio clip, sends the query to OpenAI, then shows the answer on a screen.
A week later, voila, I ordered one myself from Ali Express. It took almost 10 days to arrive, though (Amazon is faster, but €15 more expensive). Still, my inner kid erupted with joy when I opened it. I couldn’t wait to tinker with it and try out a few ideas.
M5Stick, in a nutshell, it's a tiny programmable hardware platform for IoT prototyping, featuring built-in sensors, a display, input controls, and wireless connectivity. For example, you can prototype a wearable step counter or activity tracker.
There’s an innovation studio in the UK, that I’ve always been admired of their work to combine digital experience and physical product, called Special Project. Although exploring with the M5StickC isn’t really comparable to designing a full physical product. It’s just a different medium. But it lets me step outside the mobile/web app space and start thinking in new interaction formats. I’m hopeful this is the beginning of experimenting with something bigger beyond the M5StickC.
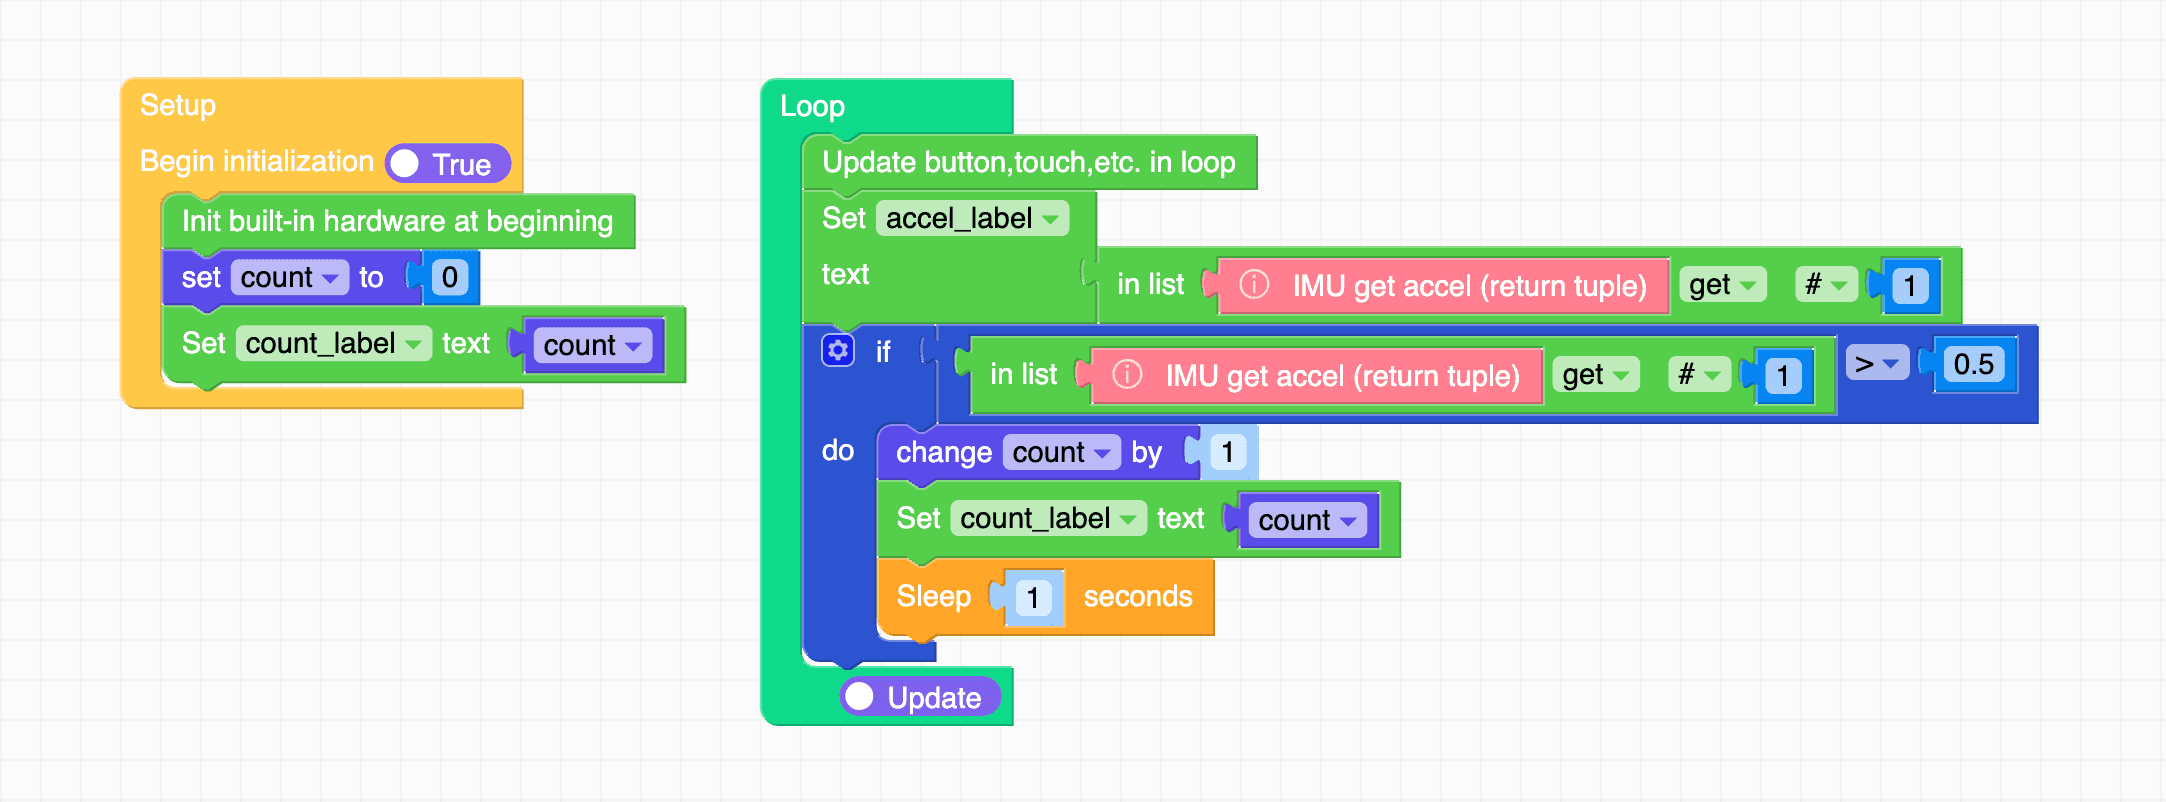
Testing an event trigger for the accelerometer in UIFlow2 drag-and-drop IDE
First things first, to get started I relied on Gemini to learn the basics, such as installing (burning) the firmware, connecting to WiFi, and finally getting started with programming. I chose UIFlow2 over Arduino, as UIFlow2 is easier to use since it combines a drag-and-drop IDE with coding. UIFlow2 code is based on Python. I never learned Python before. But I learned C and C++ back in uni. I understand the core programming concepts, but, mostly, I will rely on an LLM to help me generate the code.
I skipped the most common first lesson, the “Hello World” print. Instead, I used drag and drop to build a tilt status and test how to add visuals and handle an event. In this case, an event is triggered by the accelerometer, which detects when the device is tilted, and another event is triggered when the device tilt passes a certain value and adds to the counter.

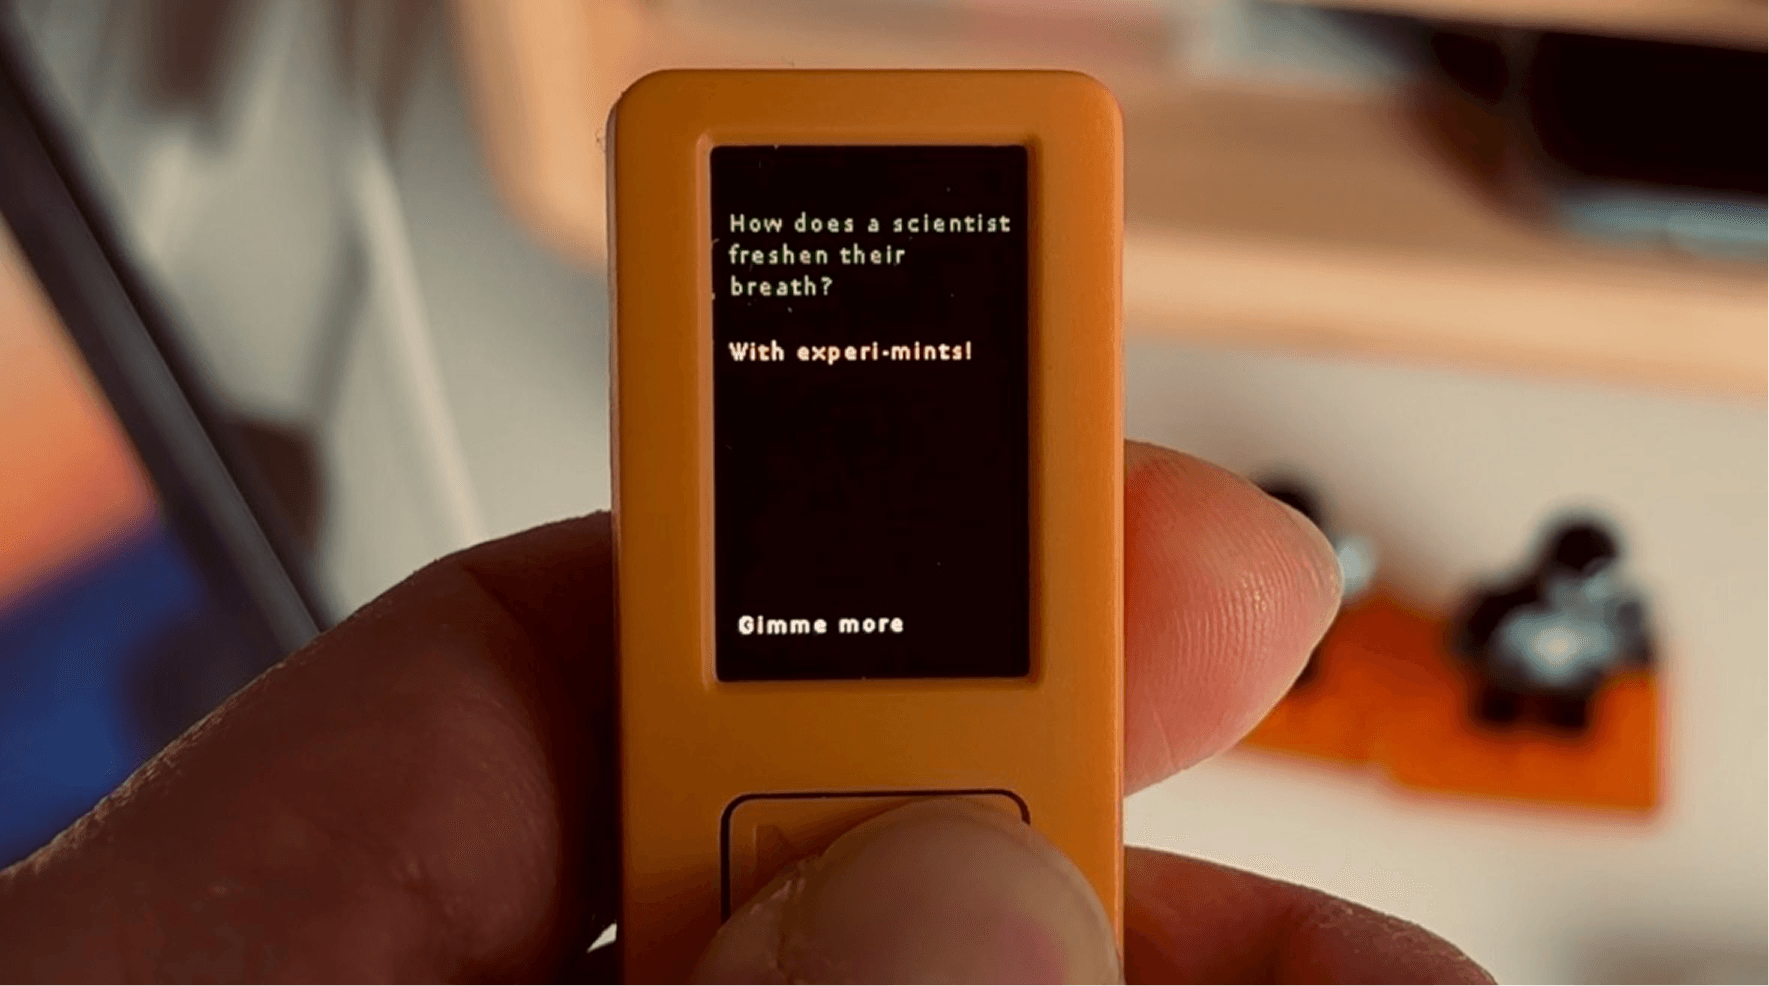
Next, I created the Gimme-a-Pun app. I connected to an API and used the code editor.
At the beginning, I was using the drag-and-drop IDE, but I couldn’t find the API integration block. I tried looking for documentation and prompting AI, but no luck. I course-corrected a couple of times as the AI hallucinated a lot with references to UIFlow version 1. I jumped into the code editor.
I had an idea: every time the main button is pressed, it gives you a pun. I used a public endpoint: https://official-joke-api.appspot.com/random_joke
I generated the code using Gemini Pro. Other than a text-wrapping issue, it functioned as intended. I couldn’t find a function I could call immediately. I saw an Arduino example, but I wanted to keep it in Python on UIFlow for now. I prompted a few more times and got a decent solution after giving it a reference from here: https://docs.python.org/3/library/textwrap.html
Check this out…
Some takeaways
Beyond being a hobby project, as a (digital) product designer it feels like a new playground to exercise:
Designing within tight constraints. A small screen, three buttons, no keyboard, no mouse. What can I create without them?
Thinking in a different medium. An opportunity to explore solutions beyond a mobile app. A what-if for a tool that does not live on a phone.
Mashing up my design and prototyping skills with code. It does not fully feel like coding since I am not writing much syntax, but it is not pure vibe coding either. It sits somewhere in between. Still, it’s promising. It gives me another tool I can reach for when something is better prototyped in code.
I’m looking forward to exploring more ideas.
If you’re also playing with this tiny tool, I’d love to hear from you.
